Well reports
Well reports: 3.1.2. Reports nv.EBS provides functionality for generation of reports on the operation parameters of the desired wells in the XLSX format. To generate a report,…
3.1.2. Reports#
nv.EBS provides functionality for generation of reports on the operation parameters of the desired wells in the XLSX format.
To generate a report, perform the following actions:
-
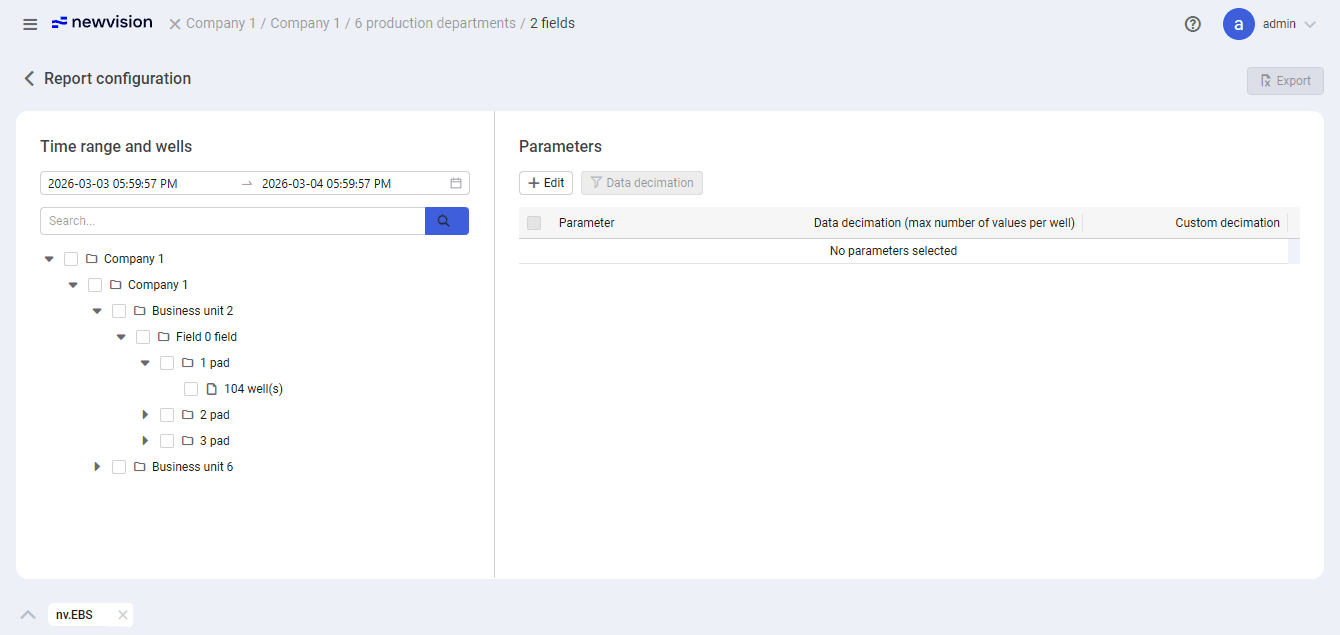
At the top of the well management pane, click Report (
 ). The Report configuration window opens.
 Select image to enlarge
 -
In the left part of the window, in the Time range and wells pane, configure the report data range:
-
At the top of the pane, in the date range picker, click the currently selected start date, and then, in the window that opens, select the start date and time of the reporting period.
-
In the date range picker, click the currently selected end date, and select the desired end date and time of the reporting period.
-
In the list of business units below, select check boxes of the desired units (enterprises, companies, production departments, fields, and/or well pads).
Note
By default, all lists are collapsed. To expand a list of units within a higher-level unit, click the arrow icon (
 ) to the left of the desired unit name.
Note
You can search for business units by name using the search field at the top of the list. The list of business units is automatically filtered as you type. To view the search results, expand the desired lists of business units.
-
-
In the right part of the window, in the Parameters pane, add the parameters whose values will be included in the report:
-
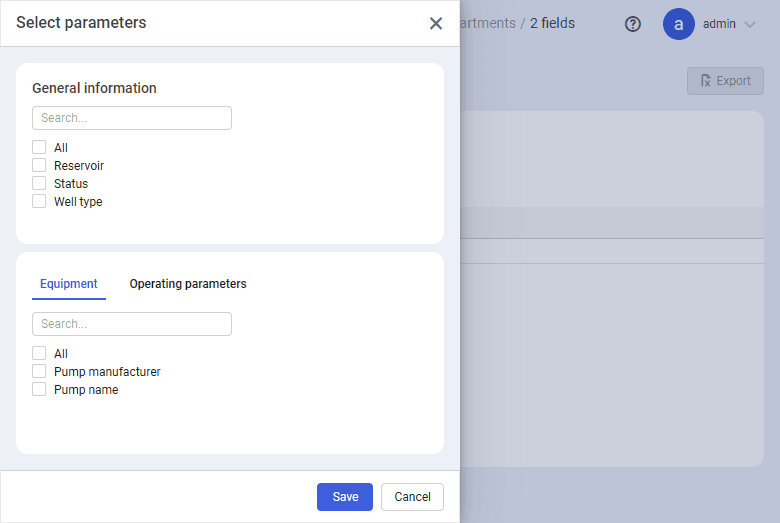
At the top of the pane, click Edit (
 ). On the left, a window for selecting parameters opens.
 Select image to enlarge
 -
In this window, in the General information pane and on the Equipment and Operating parameters tabs, select check boxes of the well parameters that will be included in the report.
-
At the bottom of the window, click Save. A table with a list of the selected parameters appears in the Parameters pane.
-
-
(Optional) To reduce the number of entries in the report, configure the data thinning in one of the following ways:
-
To configure data thinning for one parameter, perform the following actions:
-
In the table with a list of the selected parameters, in the Data decimation column, click Add in the row of the desired parameter.
-
In the window that opens, enter the maximum number of values per well for the selected parameter and click Save.
Important
The data thinning (or data decimation) algorithm allows you to reduce the total number of parameter values by a specified amount. For example, if 100 flow rate measurements were taken for a well within a specified time range, and you specify 50 as the decimation value, the report will contain every second measurement instead of all of them.
-
-
To configure data thinning for multiple parameters, perform the following actions:
-
In the table with a list of the selected parameters, select check boxes of the parameters for which the number of values should be reduced in the report.
-
At the top of the Parameters pane, click Data decimation (
 ).
). -
In the window that opens, enter the maximum number of values per well for the selected parameters and click Save.
-
-
To configure data decimation for specific wells, perform the following actions:
-
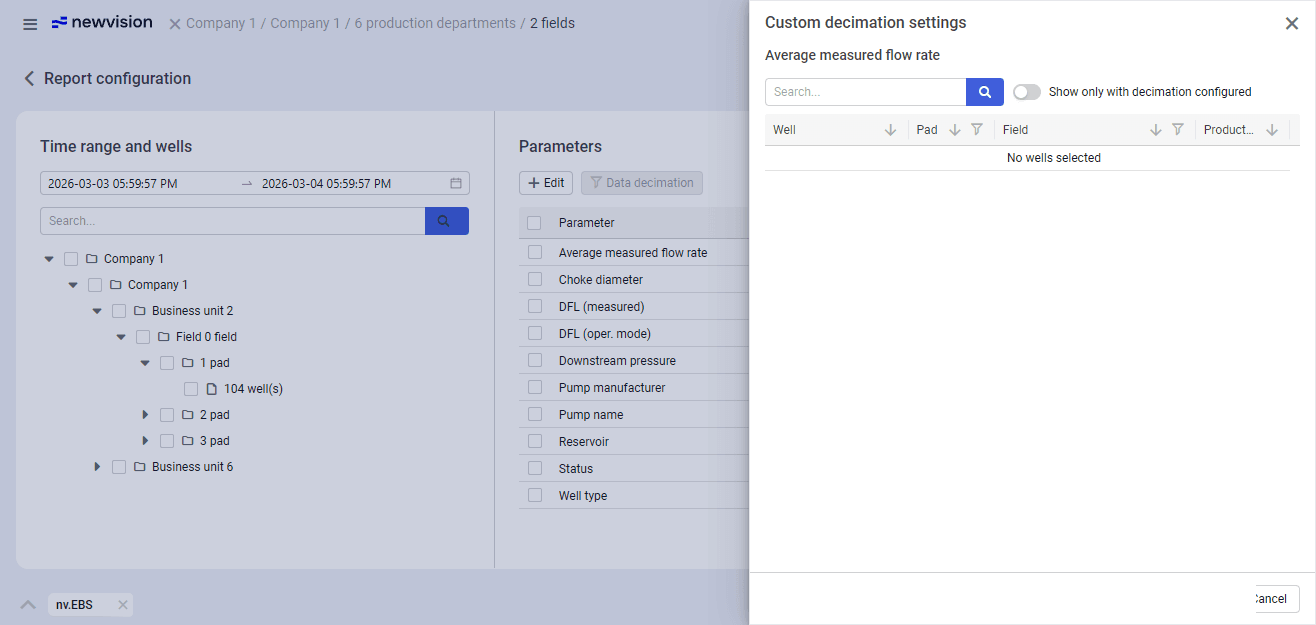
In the table with a list of the selected parameters, in the Custom decimation column, click Add in the row of the desired parameter. The Custom decimation settings window opens.
 Select image to enlarge
 -
In this window, in the rows of the desired wells, click Add in the rightmost column of the table.
-
In the window that opens, enter the maximum number of values of the selected parameters for the selected well and click Save.
-
At the bottom of the Custom decimation settings window, click Save.
-
-
-
In the upper-right corner of the Report configuration window, click Export (
 ).
).